¡NEW STORE LOCATOR JUST LAUNCHED!
100% Free. Install in minutes. Zero coding
required. Customizable. Works on any website,
regardless of how or where you built it. Save money with forever free updates and support. Download
now!
ADJUSTING THE SETTINGS
1. Go to System -> Configuration
-> IWD Extensions -> Store Locator
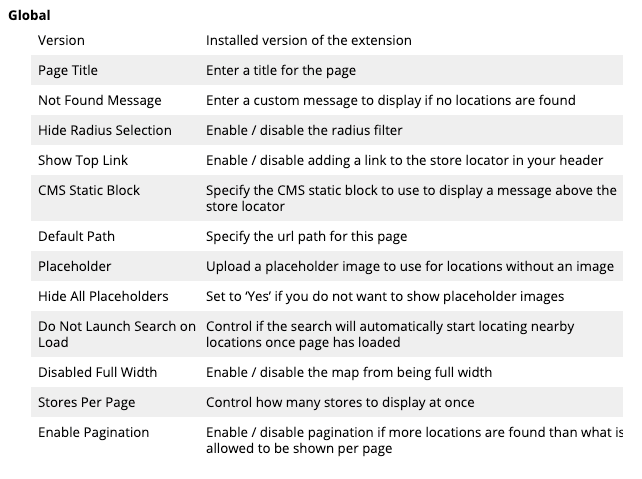
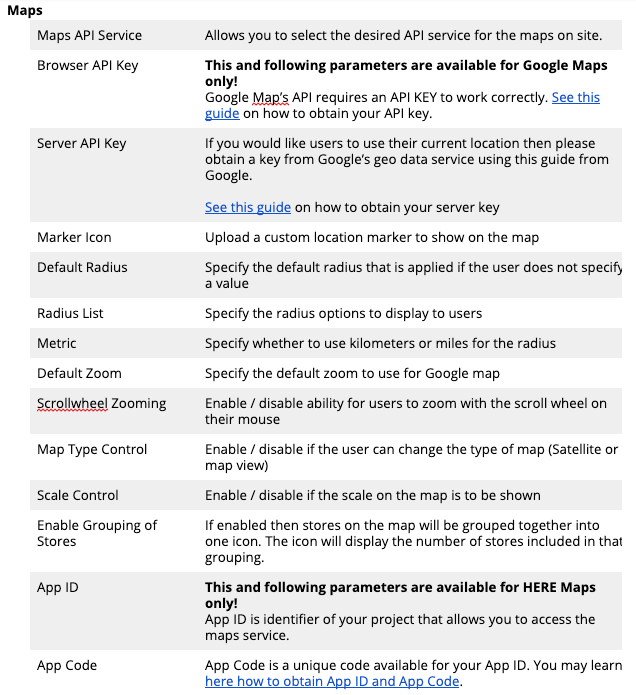
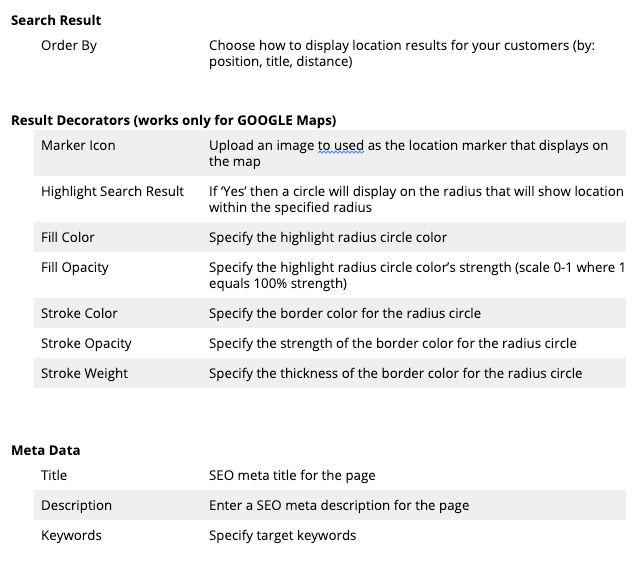
2. Customize the extension by completing
the fields listed below:
USING
SPECIFIC FEATURES
1. Not found message: If a
store does not exist or the data has
been entered incorrectly the following
message appears.

2. Hide Radius selection: You
can hide the button Radius if needed.

3. Show Top Link: includes link
to Store Locator in your header.

4. СMS Static Block:

5. Default Path: You can choose
the exact path to your store you need. By
default, location of your store locator is yourdomain.com/dealers.
Please note that in configuration where
default path is, there shouldn’t be any
slashes.

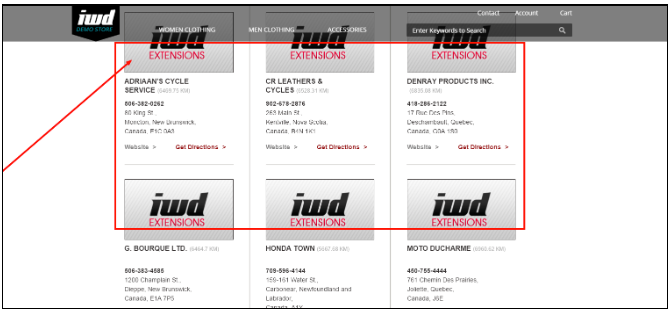
6. Placeholder: upload the
image for placeholder icon.
UNDERSTANDING THE SEARCH LOGIC
By default, here is how the Store
Locator works:
1. User enters a location.
2. System uses coordinates of that location
as a starting point and searches for locations
around that point within the specified radius.
- For example: if you use your current
location (Server API key) it is used as a
starting point and the system searches for
locations within a specified range.
- If you specify city or state, then the
system identifies location of city/state
and will use it as starting point for the
search
There is a default radius in the settings (25
km). If you don’t choose radius, the extension
will use the default radius.
Note: Search logic is
based on Google maps. According to Google
maps, city is most important and preferable
variable to use for the best results. In the
event city and state coincide (for example
Washington city and Washington state) you need
to clarify and indicate what are you looking
for.
IMPORTING
LOCATIONS
1. To import locations into the Store
Locator, please go to System → IWD Extensions → Store Locator and click the Import Stores button
2. Prepare an XML or CSV file with the
exact column order:
- title
- is_active
- phone
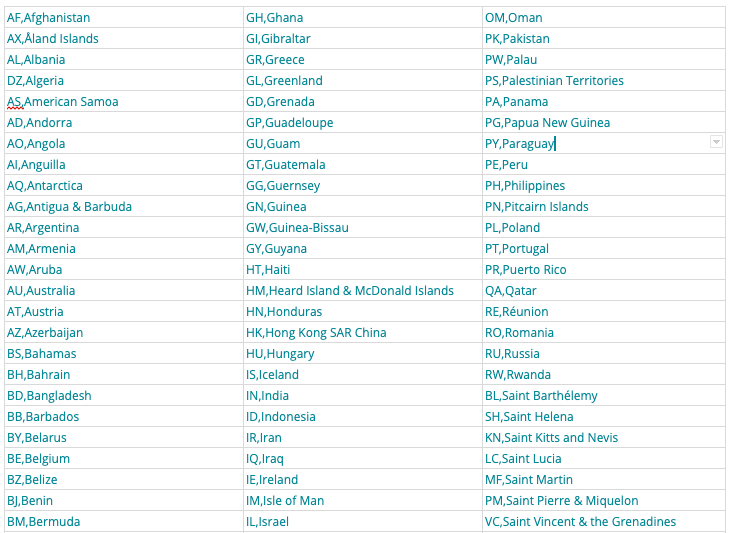
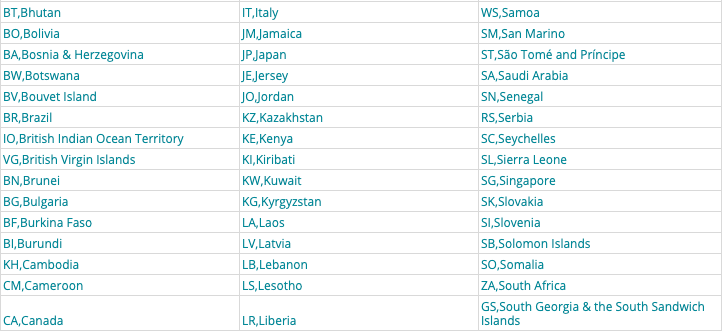
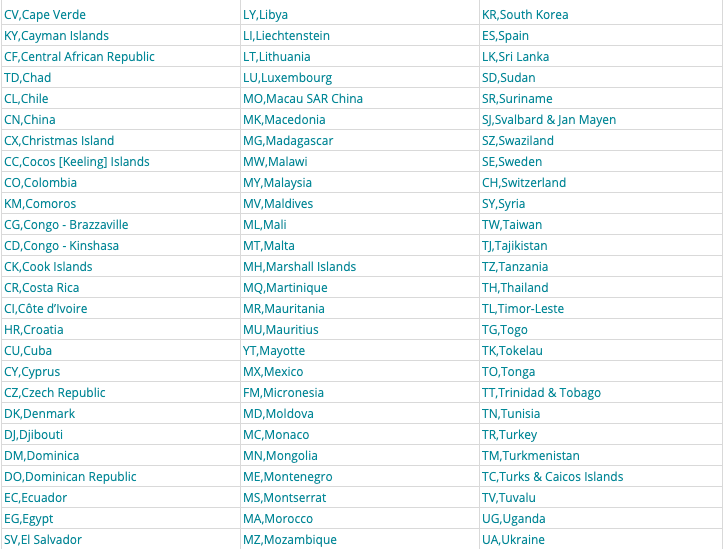
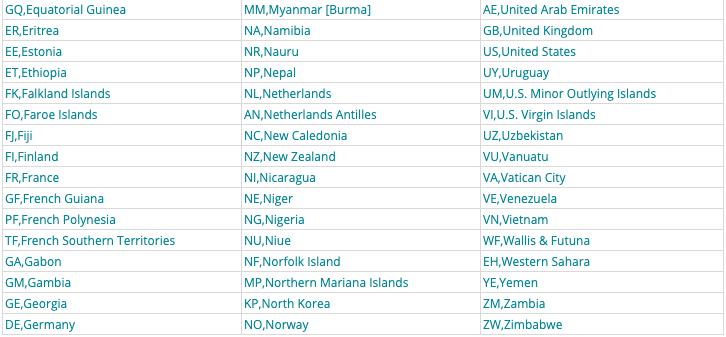
- country_id (see below for a list of
country IDs)
- region
- street
- city
- postal_code
- description
- latitude
- longitude
- stores
- website
- icon
- images
- position
3. To view and download an example file,
please click here
4. Once you have formatted your file
correctly, please upload the file and click
the Check and Import Data button
COUNTRY
ID’S
GOOGLE API
RESTRICTIONS
Google doesn’t provide any free amount of
requests anymore. You may learn more in Google
Maps API
documentation.
Refer to that article as well to learn
more about the Google Premium
Plan.
