How to Configure or Add additional payment gateways to your IWD Checkout Suite?
IWD Checkout Suite has now more than 120 payment gateways already integrated and available for you to use on the checkout-page. By default only Authorize.Net and Braintree are available on each account as additional payment methods, however, if you need an additional payment gateway to be turned on, please send us an email to extensions@iwdagency.com. In order to turn-on an additional payment gateway please follow these steps:
- Access your IWD Checkout account here: https://www.iwdagency.com/account
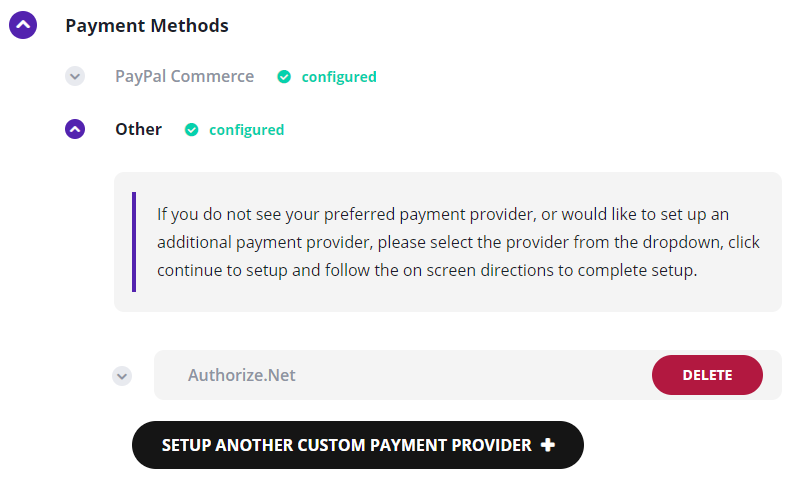
- Go to IWD Checkout -> Default Settings -> Payment Methods -> Other

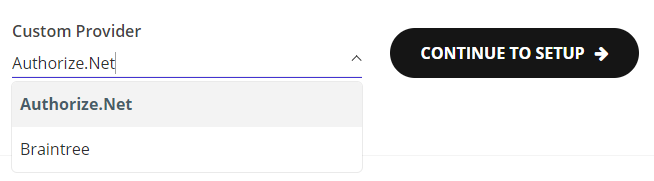
- Select the preferred payment gateway from the drop-down control, and click on the Continue to setup button.
- Please fill out all the required fields to configure the payment gateway. Each payment gateway will ask for different information. These information can be obtained from your Payment Gateway provider.
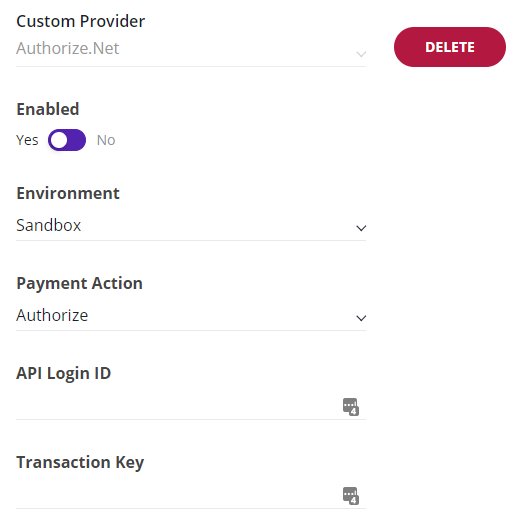
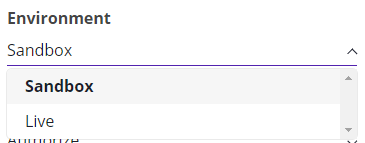
- Select the Environment type of your gateway. Use Sandbox to place test orders using the selected gateway and use Live environment to process real payments.
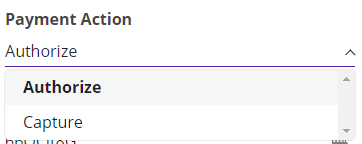
- Select a Payment Action that will dictate how your payment gateway will process the orders each time a customer places an order. Use Authorize, to only validate your customer's funds, this option will not make the money available for you until you execute the Capture process. Use Capture, to capture automatically the money from your customer's bank account when an order is placed.
- Once you have filled out all the required information, click on the Save button.
- Once you have completed the On-boarding process, we will gather your Merchant ID automatically and configure your account to use the selected PayPal Account.
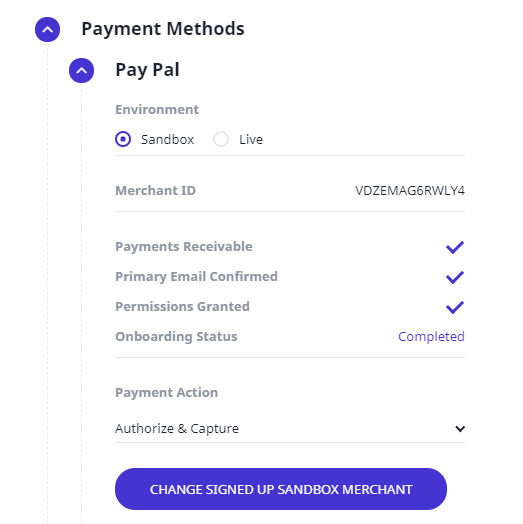
- Click the Save button.
- Once you've configured your preferred payment gateway. IWD Checkout will show a payment gateway section for your configured payment gateway to allow you to modify any credential or settings in the future.