
How does the IWD Checkout
work?
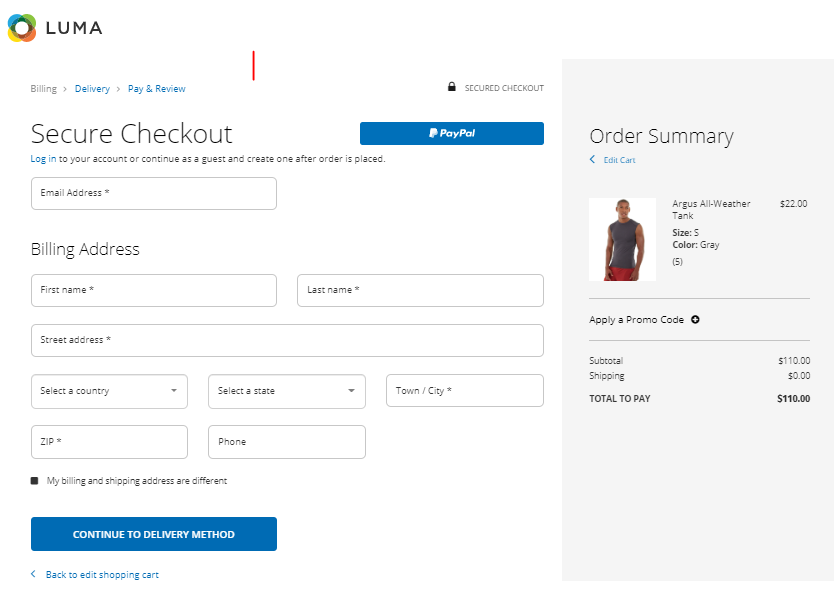
The IWD Checkout is a
cloud-based checkout-page that
replaces your existing eCommerce
platform's Checkout-Page with an
iframe that displays your already
configured IWD Checkout. By placing
the IWD Checkout-Page on an iframe, it
will allow us to maintain your
same-store URL address, so the users
avoid being redirected to another
page, causing confusion and cart
abandonment.
IWD Checkout solution
depends on four key platforms to
work:
- An eCommerce Store with an IWD
Checkout Connector. The
Connector will help us to display
the checkout-page on your store
and communicate with the IWD
Checkout Platform to send and
receive information related to the
checkout process. i.e., Cart,
Customers, Payments, Refunds,
etc.
- IWD Checkout Platform
(Checkout-Page): This
is the brain of your
checkout-page. The IWD Checkout
Platform will display your
configured checkout-page on the
Connector iframe, and it will
communicate and synchronize data
between your eCommerce Store and
the Payment Gateways.
- Payment Gateways: A
payment gateway will be needed to
process all the orders coming
through the IWD Checkout page. IWD
Checkout Suite has more than 120
payment gateways from all around
the globe, available for you to
configure and use.
- PayPal Commerce Platform (Most
advanced payment gateway in
the market): PCP will
process your payments, refunds,
and any other activity related to
your processed and unprocessed
orders. The IWD Checkout will
communicate with the PayPal
Commerce Platform to extract and
execute tasks made on your
eCommerce store.
What kind of information does
the IWD Checkout - eCommerce Connector
exchanges with IWD?
For the IWD Checkout-page to work, the
IWD Checkout Connector exchanges the
following information with the IWD
Checkout platform:
- Cart Information
- Cart ID
- Products
- Coupons & Promotions
- Tax Info.
- Subtotals & Grand Totals
- Customer Information (If customers are
logged-in into your platform)
- Contact Details (Email, Name, Last
Name)
- Billing & Shipping
Addresses
- Shipping Methods
- Available Shipping methods for the
current cart
- Shipping Method Name and
rates
Task List before enabling the
IWD Checkout
Before proceeding on enabling
your IWD Checkout, please make sure you
have performed the steps noted in the
following task list:
- You have created an Integration for
your Store on your IWD Checkout
account.
- Downloaded and Installed the IWD
Checkout eCommerce Connector on your
eCommerce Store.
- You have Configured the API Key and
received a Connection Succesful
message on your eCommerce Store.
- You have configured at least a payment
gateway to be used on your
checkout-page on your IWD Agency
account.
- You have Configured a PayPal Commerce
Platform account.
- You have marked the customer's phone
field as mandatory on your PayPal
account: https://www.paypal.com/us/smarthelp/article/how-do-i-make-the-phone-field-mandatory-with-checkout-faq3691
- You have Customized your IWD
Checkout-page & PayPal buttons
design.
- You have Tested on Sandbox mode
transactions made with the IWD
Checkout Platform & PayPal.
- You have HTTPS configured and enabled
for your website.
How to Configure a PayPal
Commerce platform account?
IWD Checkout integrates the
newest payment platform from PayPal named
PayPal Commerce Platform that comes with
an On-boarding process that will
facilitate the migration of your existing
PayPal account. If you have not yet a
PayPal account, you will be able to create
it using the same steps noted below:
- Access your IWD Checkout account here: https://www.iwdagency.com/account
- Go to IWD Checkout -> Configurations -> Payment Methods -> PayPal
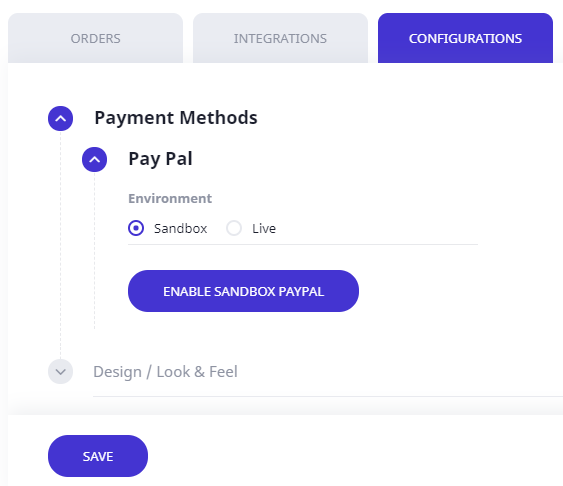
- Click the Enable Sandbox PayPal button, and a pop-up window will display with the On-boarding process.
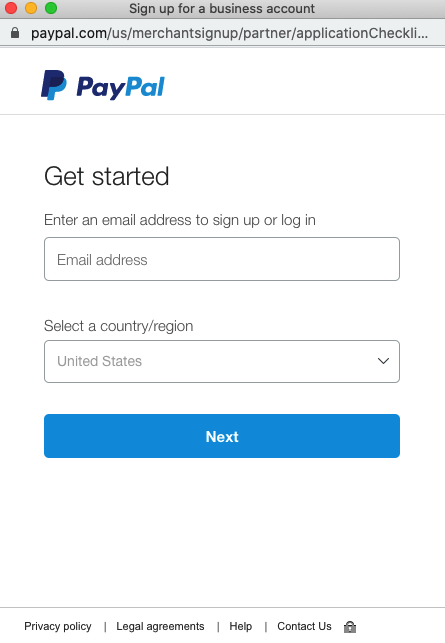
- Follow the steps shown on the PayPal
On-boarding process page.
- Follow the
steps shown below to
make it mandatory
for your customers to
provide their phone
number with
checkout (Only for
PayPal Business
Accounts).
- Access to your PayPal
account.
- Click the Settings icon
next to "Log out."
- Click Website
payments under
"Products & Services" on the
left of the page.
- Click Update next
to "Website preferences."
- Select On
(required
field) under
"Contact telephone" in the
"Contact telephone number"
section.
- Once you have completed the On-boarding process, we will gather your Merchant ID automatically and configure your account to use the selected PayPal Account.
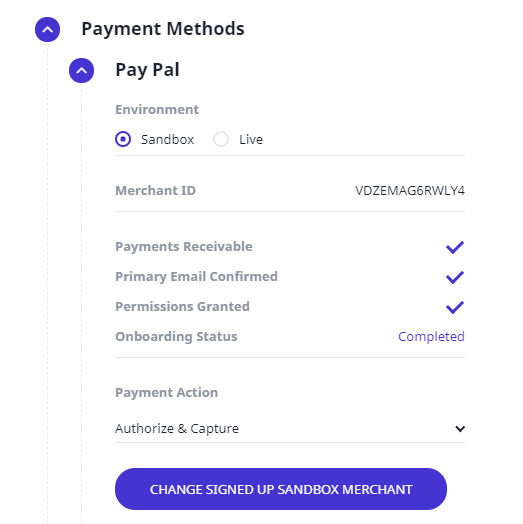
- Click the Save button.
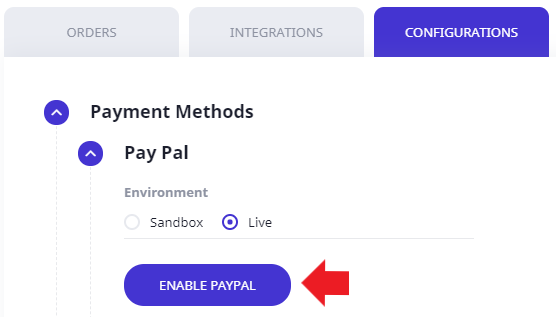
- Once you've configured your PayPal
account. IWD Checkout will enable the
PayPal payment section where you will
be able to switch between Sandbox and
Live environment and change the look
& feel of the PayPal Smart-buttons
at any time. The Payment
Action controls
will allow you to select between three
different Authorization and Capture
methods.
- Only Authorize
- Authorize and Capture
- Immediate Capture
How to Configure or Add additional
payment gateways to your IWD Checkout
Suite?
IWD Checkout Suite has now more than 120
payment gateways already integrated and
available for you to use on the
checkout-page. By default only
Authorize.Net and Braintree are available
on each account as additional payment
methods, however, if you need an
additional payment gateway to be turned
on, please send us an email to extensions@iwdagency.com.
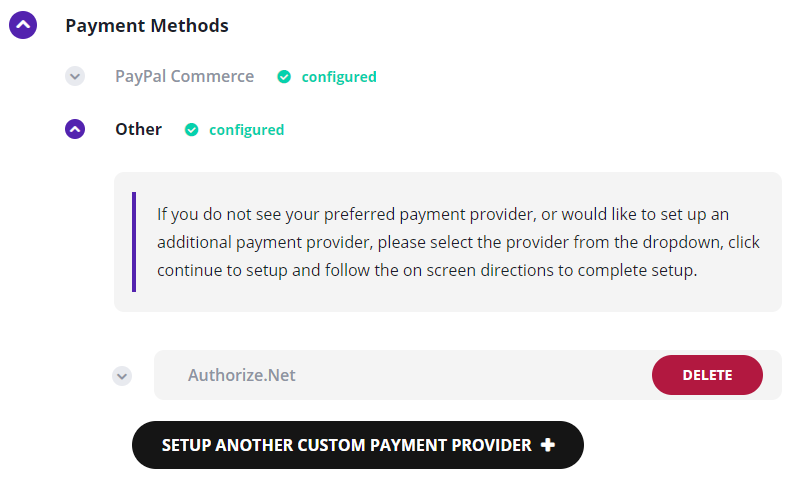
In order to turn-on an additional payment
gateway please follow these steps:
- Access your IWD Checkout account here: https://www.iwdagency.com/account
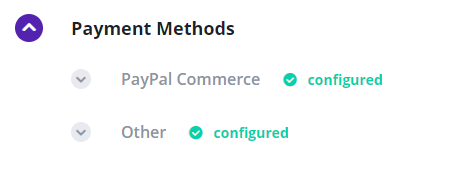
- Go to IWD Checkout -> Default Settings -> Payment Methods -> Other

- Select the preferred payment gateway from the drop-down control, and click on the Continue to setup button.
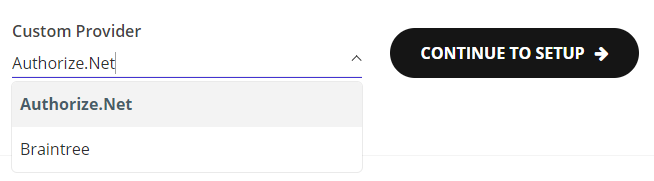
- Please fill out all the required fields to configure the payment gateway. Each payment gateway will ask for different information. These information can be obtained from your Payment Gateway provider.
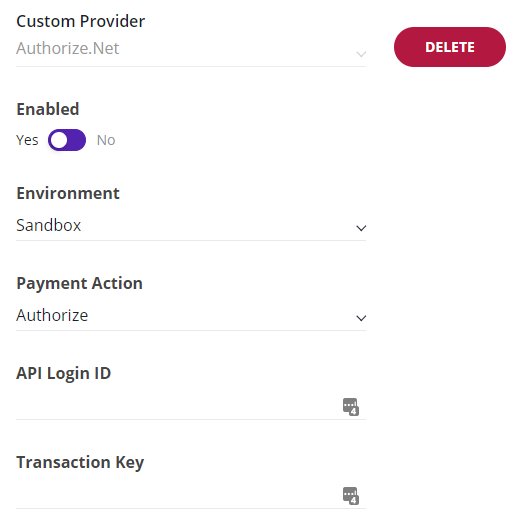
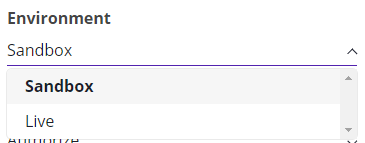
- Select the Environment type of your gateway. Use Sandbox to place test orders using the selected gateway and use Live environment to process real payments.
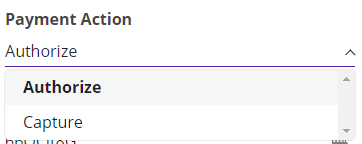
- Select a Payment Action that will dictate how your payment gateway will process the orders each time a customer places an order. Use Authorize, to only validate your customer's funds, this option will not make the money available for you until you execute the Capture process. Use Capture, to capture automatically the money from your customer's bank account when an order is placed.
- Once you have filled out all the
required information, click on the Save button.
- Once you have completed the On-boarding process, we will gather your Merchant ID automatically and configure your account to use the selected PayPal Account.
- Click the Save button.
- Once you've configured your preferred payment gateway. IWD Checkout will show a payment gateway section for your configured payment gateway to allow you to modify any credential or settings in the future.
How to enable the Sandbox environment for a payment gateway?
Once you have configured your
Payment Gateway, please follow these
steps:
- Access your IWD Checkout account here: https://www.iwdagency.com/account
- Go to IWD Checkout ->
Configurations -> Payment
Methods
- Select the preferred payment gateway from the list:
- Locate the Environment option and select the Sandbox option.
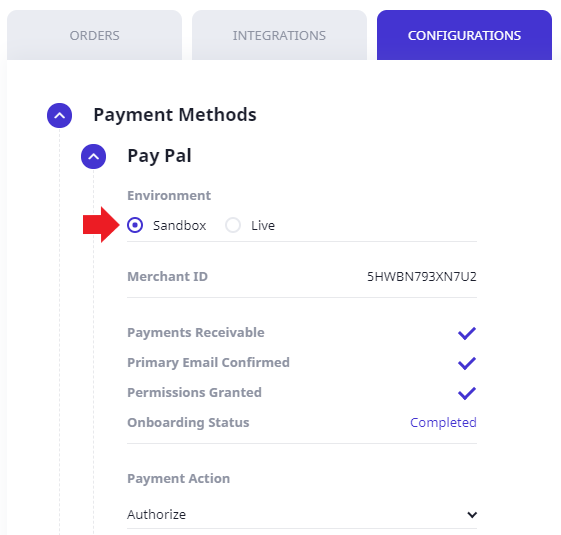
- Click the Save button.
Switching a Payment Gateway to use Live credentials
Warning
By modifying the
Environment settings on the
Default Settings tab will
force all your integrations
using Default Settings to use
a live environment to process
orders.
Once you have tested your IWD
Checkout and you're ready to go live,
please follow these steps to switch to
the live environment:
- Access your IWD Checkout account
here: https://www.iwdagency.com/account
- Go to IWD Checkout ->
Configurations -> Payment
Methods
- Select the preferred payment gateway from the list:
- Locate the Environment option and select the Live option.
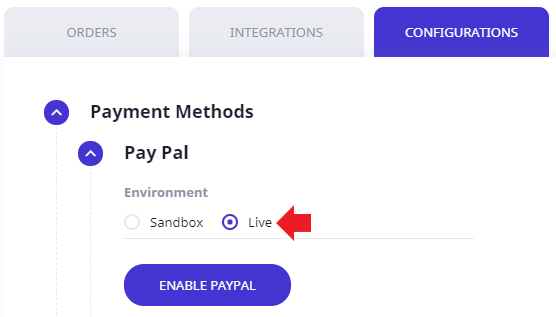
- If using PayPal, click the Enable PayPal button and follow the steps shown on PayPal's Onboarding process window.
- Click the Save button.
How to Customize my
Checkout-Page?
IWD Checkout allows you to have
a Default Configuration Design for all your store's
checkout-pages or to configure each
Checkout-page individually.
To configure the checkout-page
design:
- Access your IWD Checkout account here: https://www.iwdagency.com/account
- If you want to change the default
checkout-page configuration:
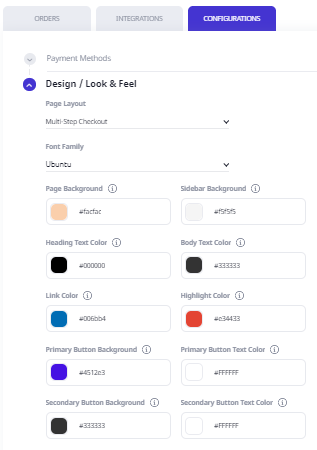
- Go to IWD Checkout -> Configurations -> Design / Look & Feel
- If you want to customize each
integration/store checkout-page
individually:
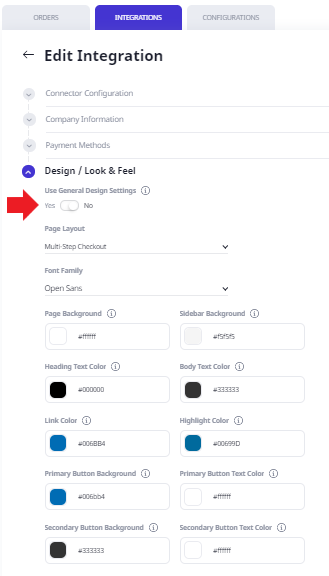
- Go to IWD Checkout -> Integrations
- Click Edit Store icon and click on the Design / Look & Feel section

- Set to No the Use General Default Settings option.
- Customize:
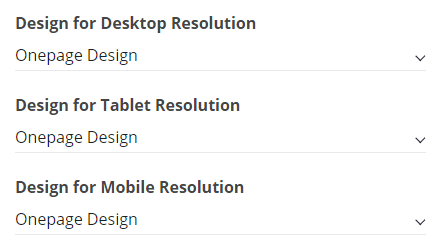
- Select the Checkout-Page Layout
you want to use per device:
- Multi-step
layout
- One Page Checkout
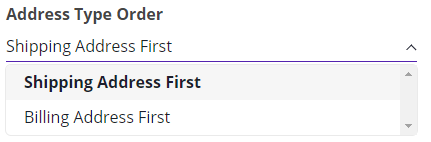
- Select the Address Type Order, that will dictate which Address field needs to be filled out first on your checkout page.
- Select your store's Font that will be used on your Checkout-Page. IWD Checkout uses Google fonts.

- Select your preferred colors for
the following
sections/buttons:
- Page
Background: This
color will be
applied to the
Checkout Page
Background.
- Sidebar
Background: This
color will be
used to the
Checkout Right
Sidebar
Background.
- Heading Text
Color: This
color will be
applied to
Headings and
Titles.
- Body Text
Color: This
color will be
applied to any
Body or
Informational
Text
- Link
Color: This
color will be
applied to all
Links on the
Checkout
Page.
- Highlight
Color: This
color will be
used to
Highlight
Chosen Options
and Focus
Input
Fields
- Primary Button
Background: This
color will be
used to
Primary Action
Buttons
Background.
Ex: Continue
To Delivery
Method,
Continue To
Payment, Place
Order.
- Primary Button Text
Color: This
color will be
applied to
Primary Action
Buttons
Background.
Ex: Continue
To Delivery
Method,
Continue To
Payment, Place
Order.
- Secondary Button
Background:
This
color will be
applied to the
Secondary
Action Buttons
Text. Ex:
login, Reset,
Apply a Promo
Code.
- Secondary Button Text
Color:
This
color will be
applied to the
Secondary
Action Button
Text. Ex:
login, Reset,
Apply a Promo
Code.

- Click the Save button.
How to Add Additional Checkout
Fields on the
Checkout-Page?
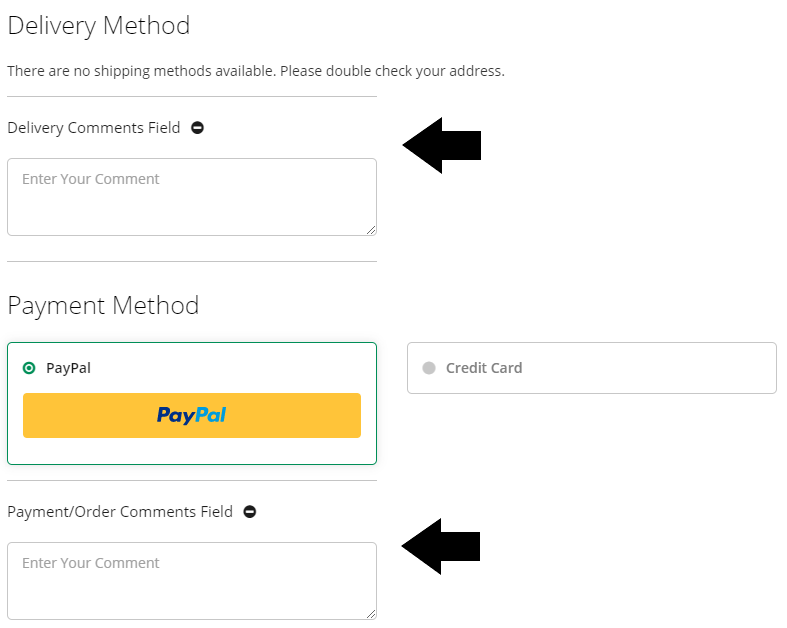
IWD Checkout allows you to
use two Additional Checkout fields
that will serve to ask your customer's
for special instructions, or important
notes at the Delivery and Payment
Method steps on the checkout process.
Each one of these fields can be
configured by modifying the field
label and place holder text to match
your business needs.
To configure the Additional Checkout
Fields:
- Access your IWD Checkout account here: https://www.iwdagency.com/account
- If you want to change the default
checkout-page configuration:
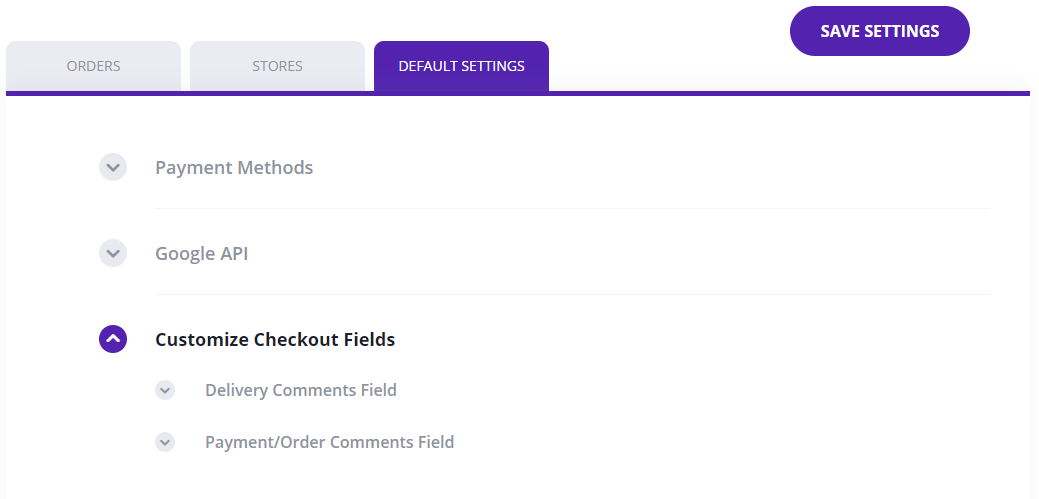
- Go to IWD Checkout -> Default Settings -> Customize Checkout Fields
- If you want to customize each
integration/store checkout-page
individually:
- Go to IWD Checkout -> Stores
- Click Edit Store icon and click on the Customize Checkout Fields
- Set to No the Use General Default Settings option.
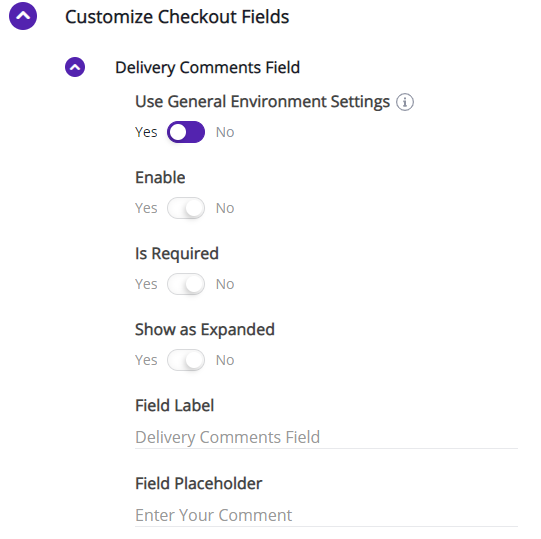
- Configure each Additional Checkout
fields based on your business
needs:
- Enabled: This
setting will
turn-on and off
the Additional
Checkout field on
the
checkout-page.
- Is
Required: This
setting will this
field as mandatory
and will be
required to be
filled out before
placing an
order.
- Show as Expanded: This setting will show the Additional Checkout Field expanded if turned on.Show as Expanded turned off:
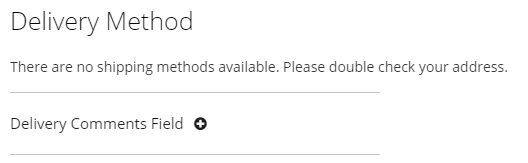 Show as Expanded turned on:
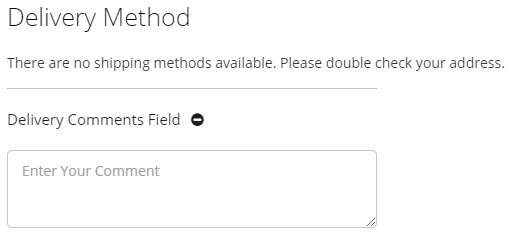
- Field Label: This setting will change the fields label as shown on the following image:

- Field
Placeholder:
This setting will
change the text
area place holder
text.

How do refunds work?
Refunds, as well as other
payment actions, are performed within your
eCommerce platform. IWD Checkout Connector
includes webhooks that connects and
synchronizes with the IWD Checkout
platform to exchange this type of
information.
If a refund is made at your
eCommerce store, it will send an API call
to our IWD Checkout platform, and we will
perform the refund on your behalf on your
PayPal Commerce Platform account and
vice-versa.
Product
Support
If you need assistance
configuring your IWD Checkout account or
IWD Checkout Connector, please send us an
email to extensions@iwdagency.com