MANAGE LABELS
1. Go to System → IWD Extensions → Order Manager → Manage Labels
2. Select one of the pre loaded labels
2. Select one of the pre loaded labels
3. Update the label name
4. Update the label icon. Select either Font Awesome or Upload Image
Font Awesome
Font Awesome
- Enter the Font Awesome icon code you want to use.
- If you do not know the code, you can click Cheatsheet. Pick an icon, then copy and paste the code you want to use in the text box. For example: fa-flag
- Click in the color text field to select a color for this icon
Upload Image
- Click Choose File
- Select an image from your computer to use as the label icon
6. Add a comment. This comment will appear on the order table when you click on the label.

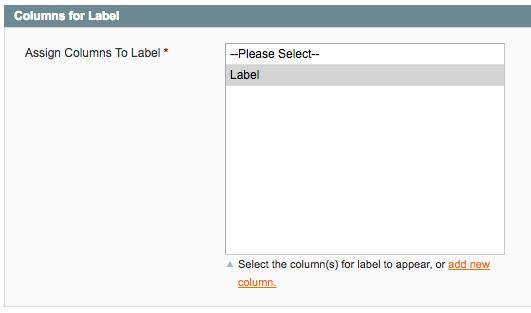
7. Assign your icon to column(s). If you want to add a new column, click add new column under the selection box.
8. Click Settings in the left menu
9. Select the statuses, payment methods and shipping methods you want this label to apply to. To select more than one, hold down the 'command' button on your keyboard while you click.
10. Click Save Label

ADD NEW LABEL
1. Go to System → IWD Extensions → Order Manager → Manage Labels
2. Click Add New Label in the top right
2. Click Add New Label in the top right
3. Name your new label
4. Select a label icon. Choose either Font Awesome or Upload Image
Font Awesome
- Enter the Font Awesome icon code you want to use.
- If you do not know the code, you can click Cheatsheet. Pick an icon, then copy and paste the code you want to use in the text box. For example: fa-flag
- Click in the color text field to select a color for this icon
Upload Image
- Click Choose File
- Select an image from your computer to use as the label icon
6. Add a comment. This comment will appear on the order table when you click on the label.

7. Assign your icon to column(s). If you want to add a new column, click add new column under the selection box.

8. Click Settings in the left menu
9. Select the statuses, payment methods and shipping methods you want this label to apply to. To select more than one, hold down the 'command' button on your keyboard while you click.
10. Click Save Label

ADD NEW COLUMNS
1. Go to System → IWD Extensions → Order Manager → Manage Labels
2. Click Manage Columns in the top right
3. Click Add New Column in the top right
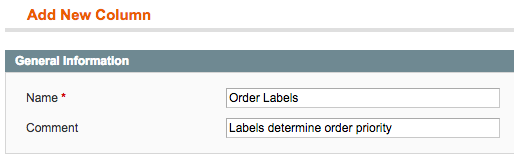
4. Name your column
5. Add a comment for this column
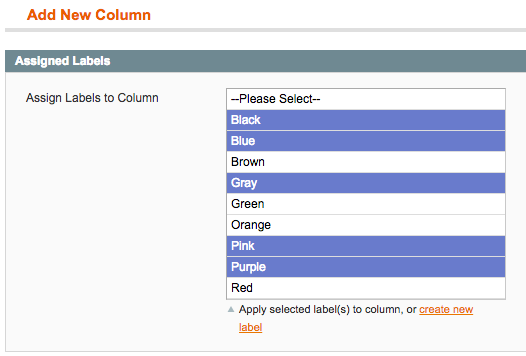
6. Click Assign Labels in the left menu
7. Select the label(s) that you want to appear in this column. To assign more than one label to a column, hold down the 'command' button on your keyboard while you click.
8. Click Save Column
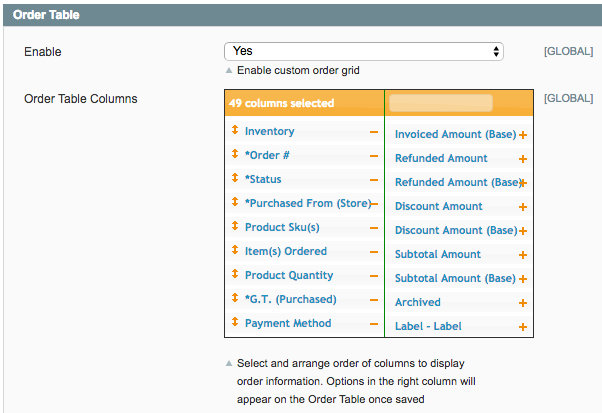
9. Go to System → Configuration → IWD Extensions → Order Manager → Order Table
10. Find the table next to Order Table Columns
11. Find the new column(s) you created. They will be in the right column. Click the + next to the columns you want to add to your order table. You can change the column's placement on your order table by clicking and dragging the column in the order you want it to appear.
12. Click Save Config