
Product / Feature Request
User Guide
Installation & Permissions
> Select “View Details” to view permissions requested by Product / Feature Request
> Select “Install app” to begin the installation process.

Documentation & Support
DOCUMENTATION
> Select "Documentation" to access the application User Guide.
SUPPORT
> Select "Support" to access IWD's customer support team.

General
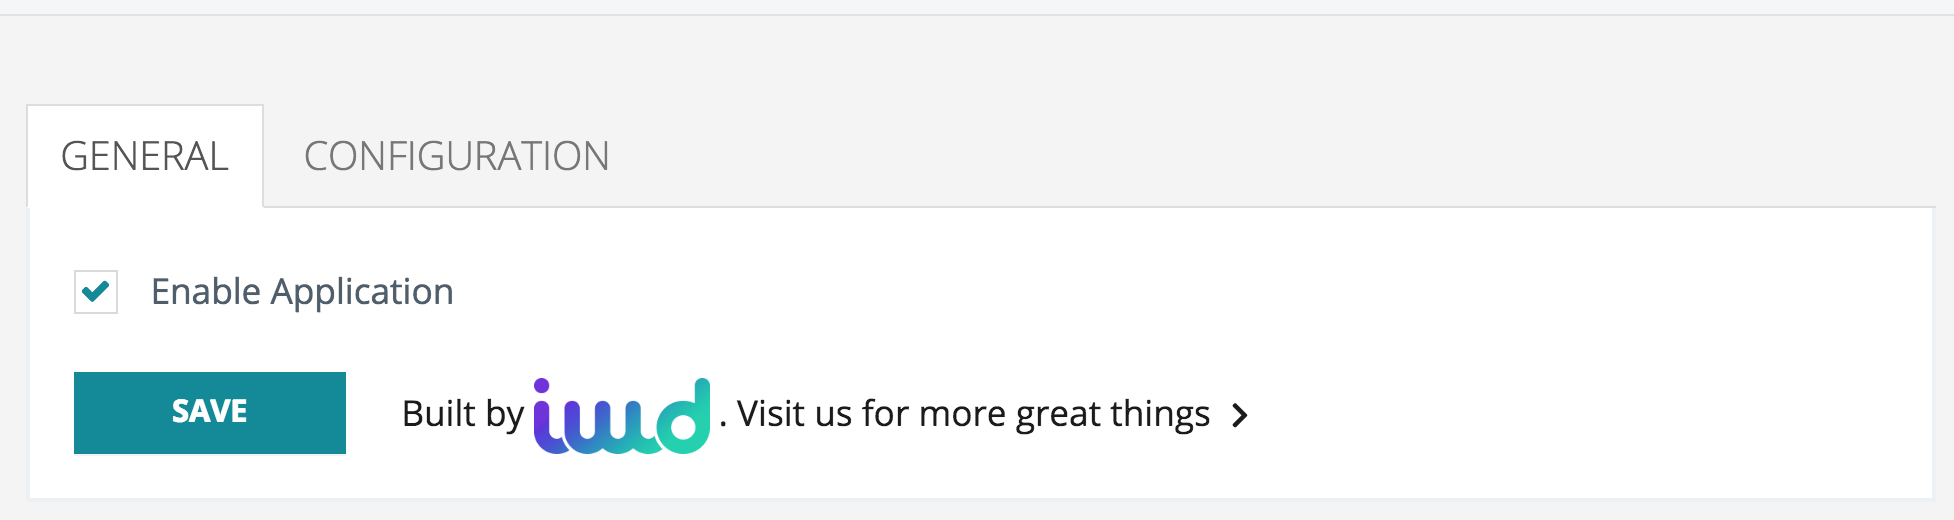
ENABLE APPLICATION
> Enable application by selecting Yes / No select. Please note that the application is automatically enabled on the product page.
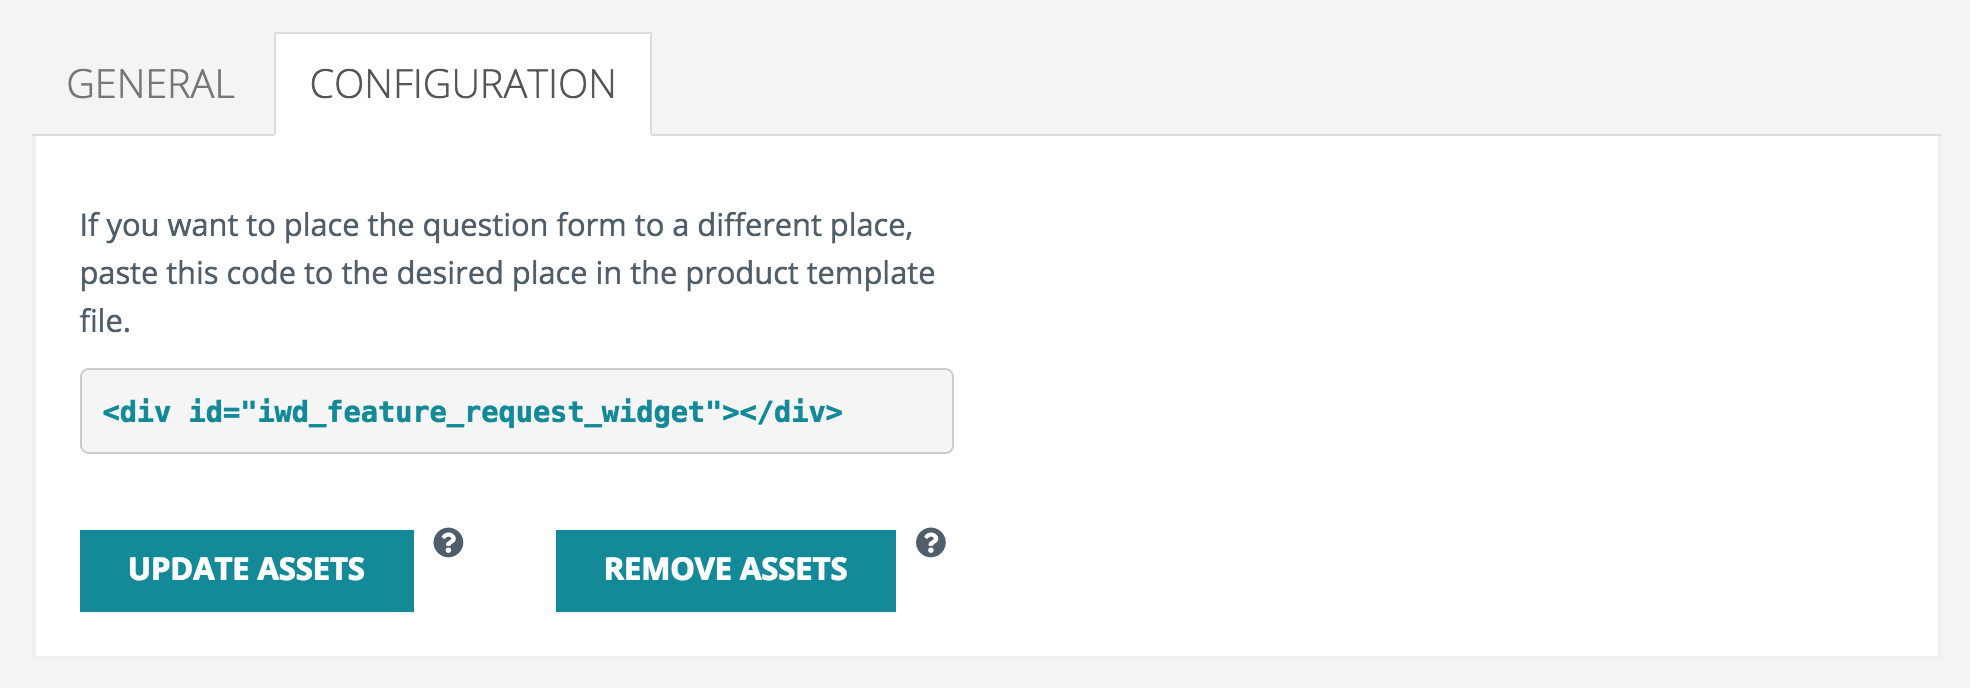
CONFIGURATION
> In order to relocate the application form to a different place, paste this code to the desired location in the product template file.
UPDATE ASSETS
> Click "Update Assets" to reinstall application files
REMOVE ASSETS
> Click "Remove Assets" to delete application files from the store. This would be done prior to removing the entire app from the store.
Settings
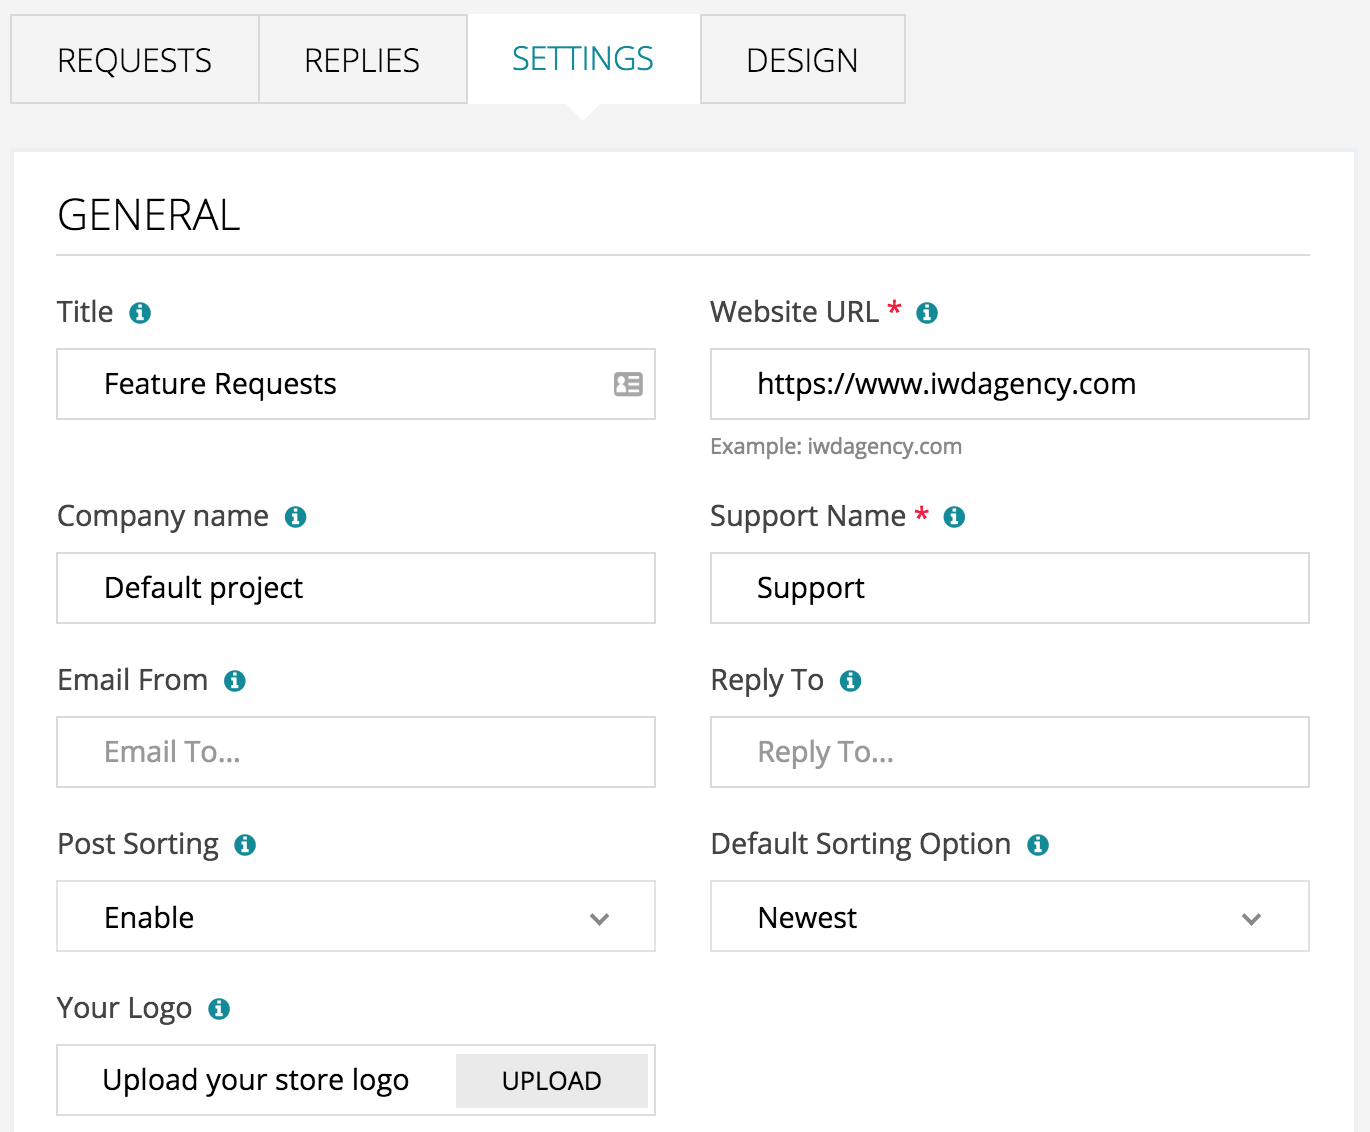
GENERAL SETTINGS
> Select a form field to make adjustments to the applications general settings.
> Settings include:
> Title - The title of the app as viewed on your website.
> Website URL - The URL of your website.
> Company Name - Company name will appear as the email sender and in the email footer.
> Support Name - Name that will appear on comments from Admin.
> Email From - Emails will be sent to users from this email address. Yahoo accounts are not supported
> Reply to - All email replies will be sent to this email address.
> Post Sorting - Allow users to sort product requests by oldest, newest, most votes and least votes.
> Default Sorting Option - Specify how to sort the posts in your widget.
> Logo - This logo will appear on your emails and verification page.
NOTIFICATIONS
> Choose between System Notification and Auto-Moderation.
> System Notification - Receive alerts when users submit requests and comments.
> Auto-Moderation - Automatically publish feature requests and comments on website without admin approval.

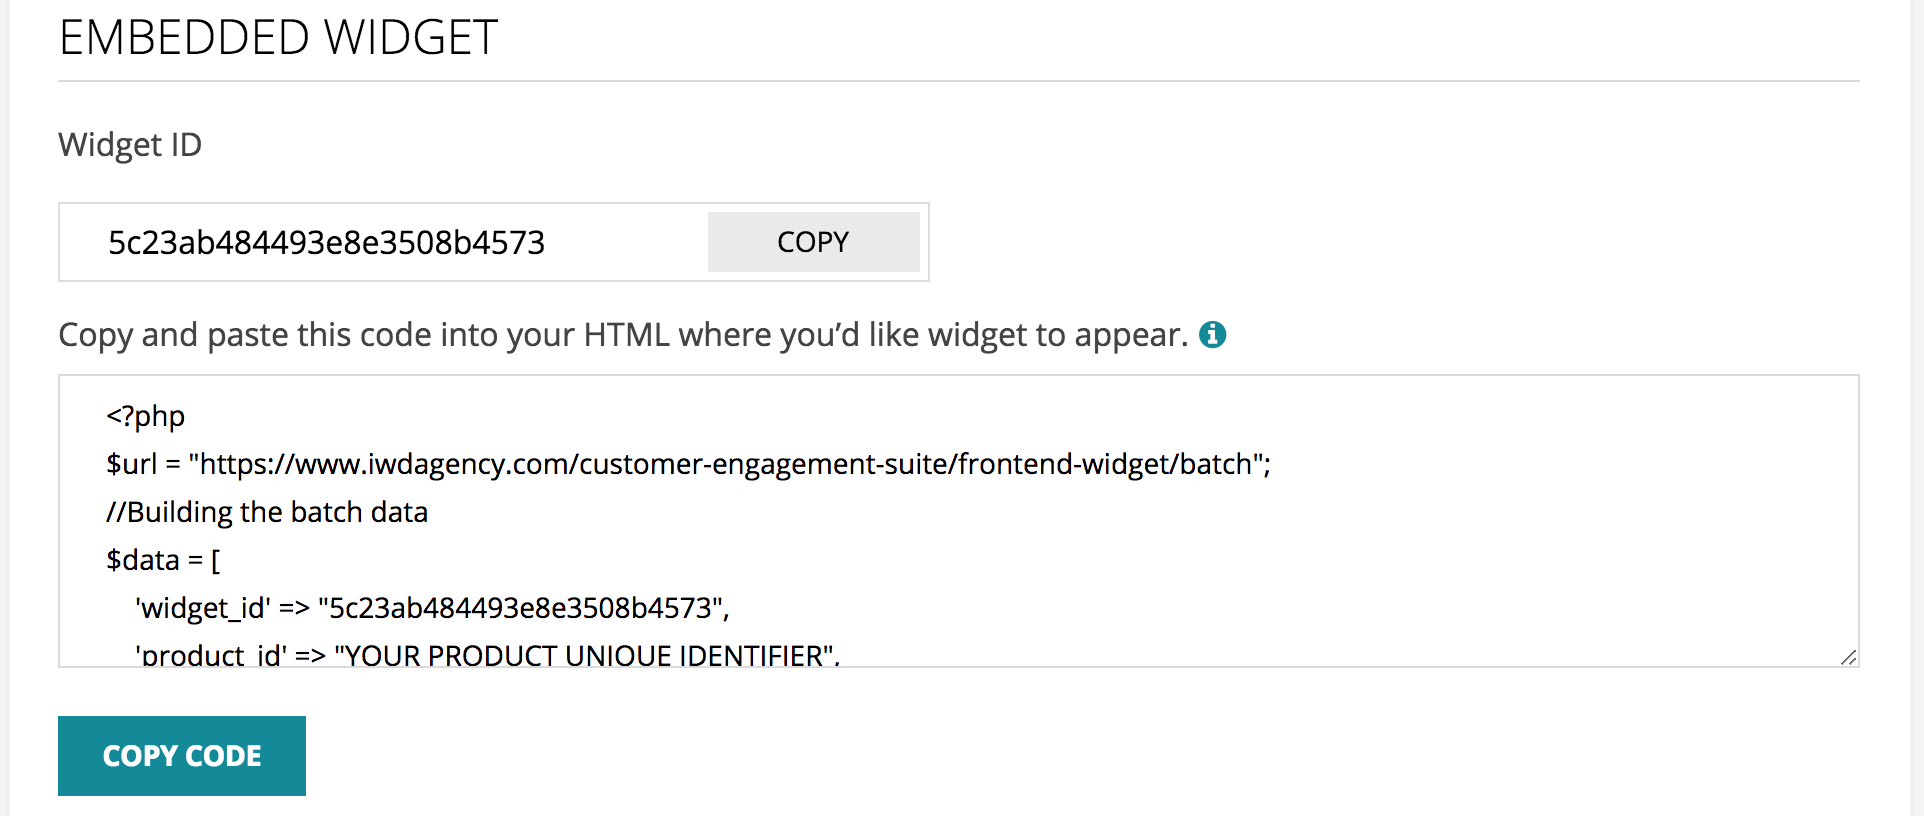
EMBEDDED WIDGET
> Copy the code using the Copy Code button, then paste the code into your HTML where you would like customer’s requests to appear on your website.
PRODUCT OVERVIEW
> Copy and paste the code into your HTML where you'd like to display the number of reviews, questions and requests for a single product.

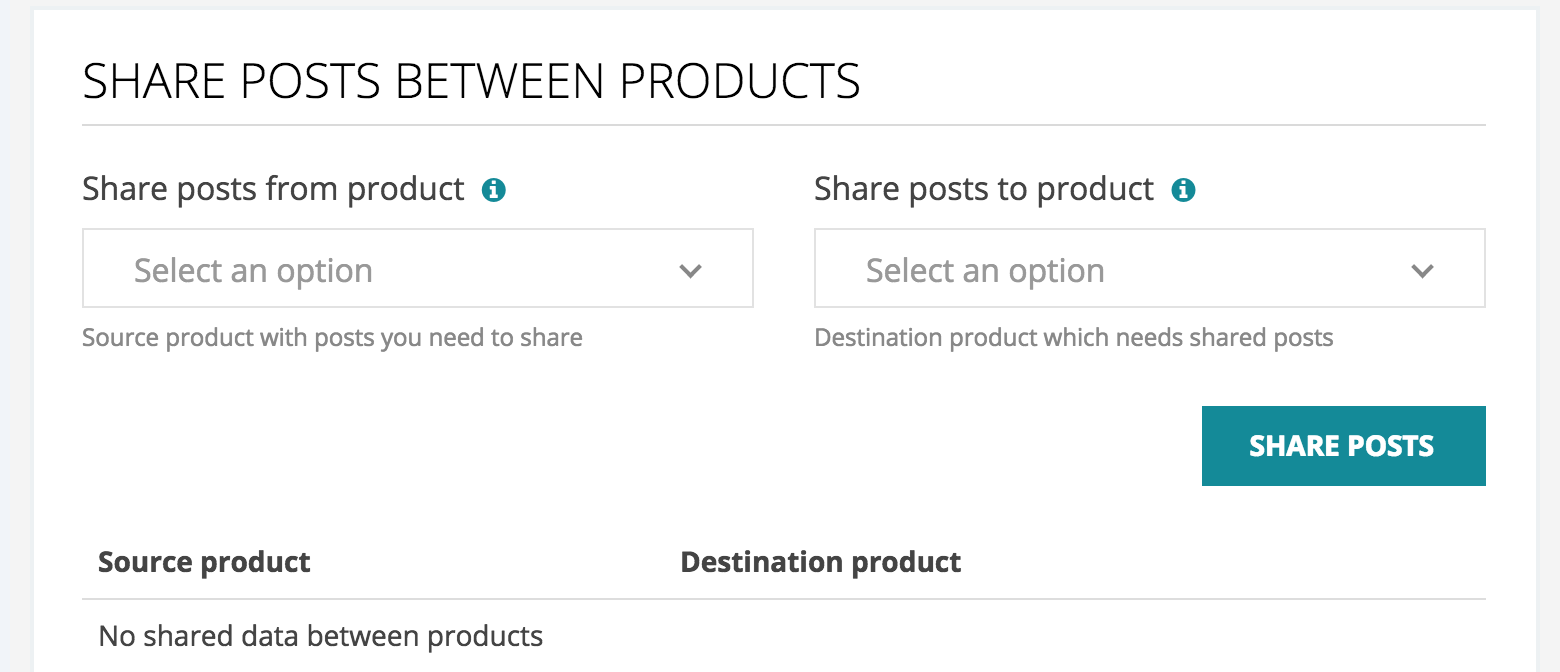
SHARE POSTS BETWEEN PRODUCTS
> Share posts from Product - Select the product with the posts that you want to display for another product.
> Share Posts to Product - Select the product that will display these posts as their own
DESIGN SETTINGS
DESIGN WIDGET
> Accent Color - Select the color you would like to apply to your buttons.
> Hover Color - Select the color for your buttons while in “hover state”.

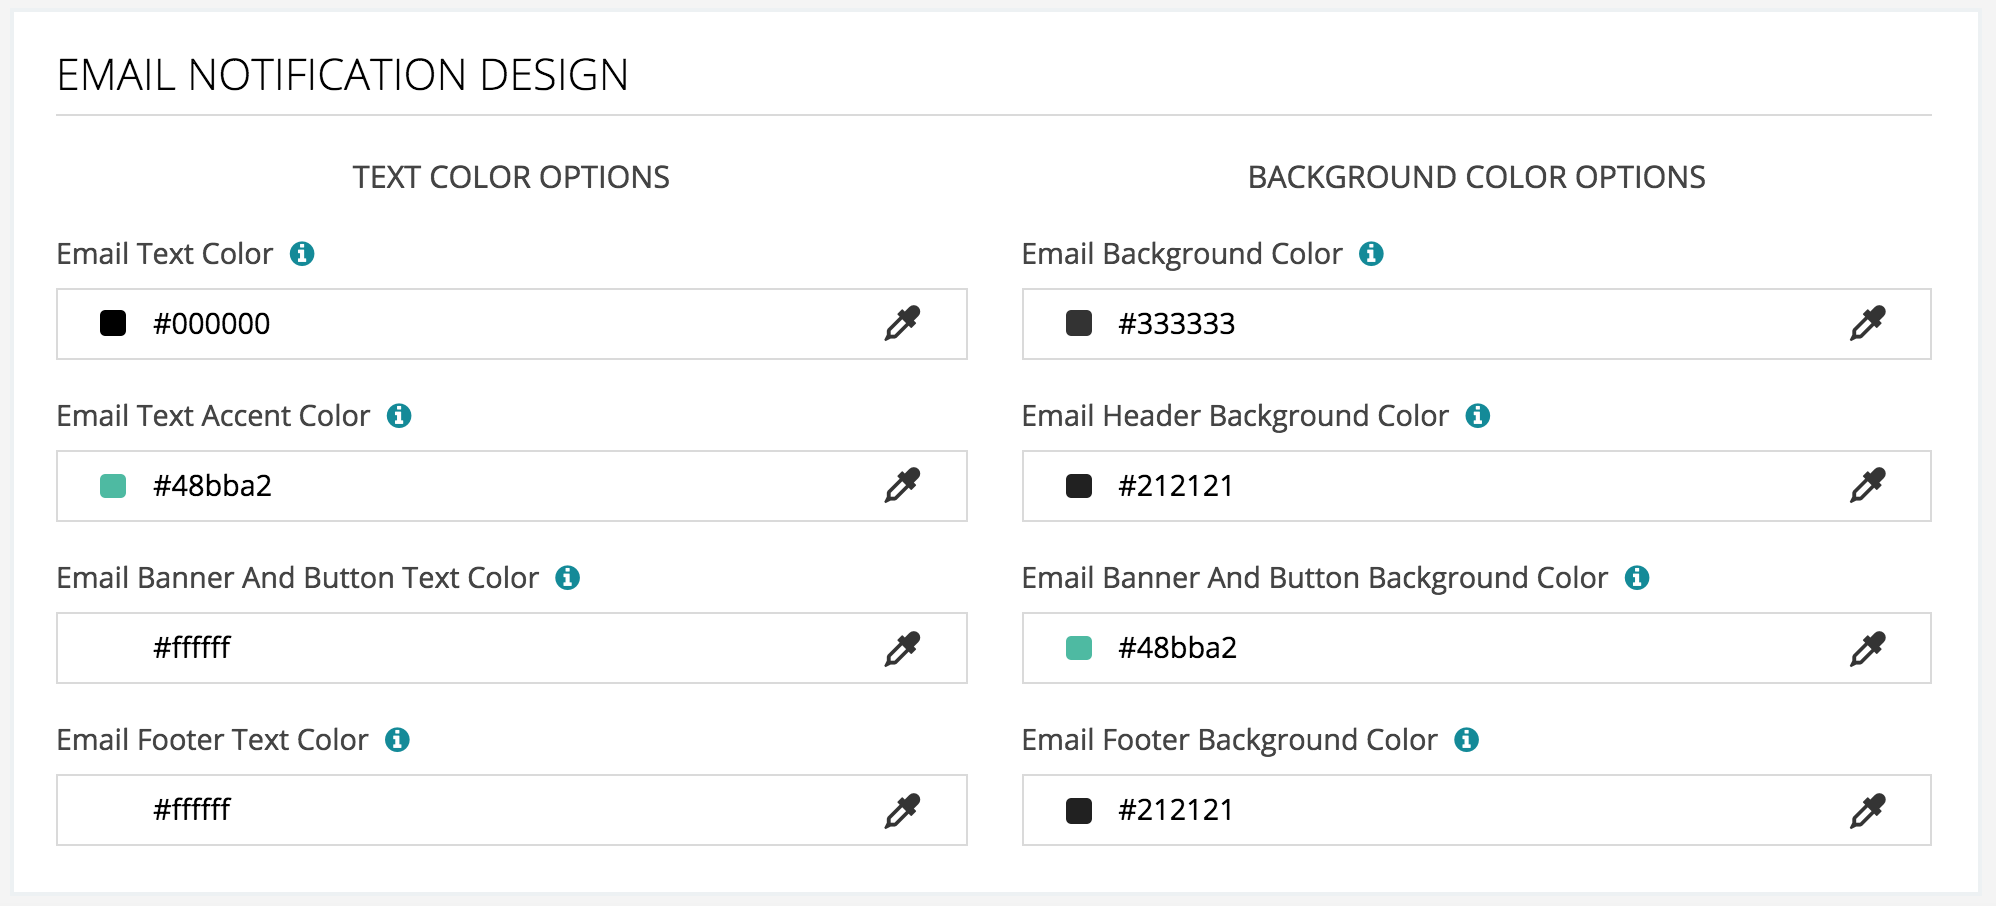
Email Notification Design
> Email Text Color - This color will apply to your email text.
> Email Text Accent Color - This color will apply to your email titles and labels text.
> Email Banner and Button Text Color - This color will apply to your email banner and button text.
> Email Footer Text Color - This color will apply to your email footer text.
> Email Background Color - This color will apply to your email background.
> Email Header Background Color - This color will apply to your email header background.
> Email Banner and Button Background Color - This color will apply to your email banner and button background.
> Email Footer Background Color - This color will apply to your email footer background.
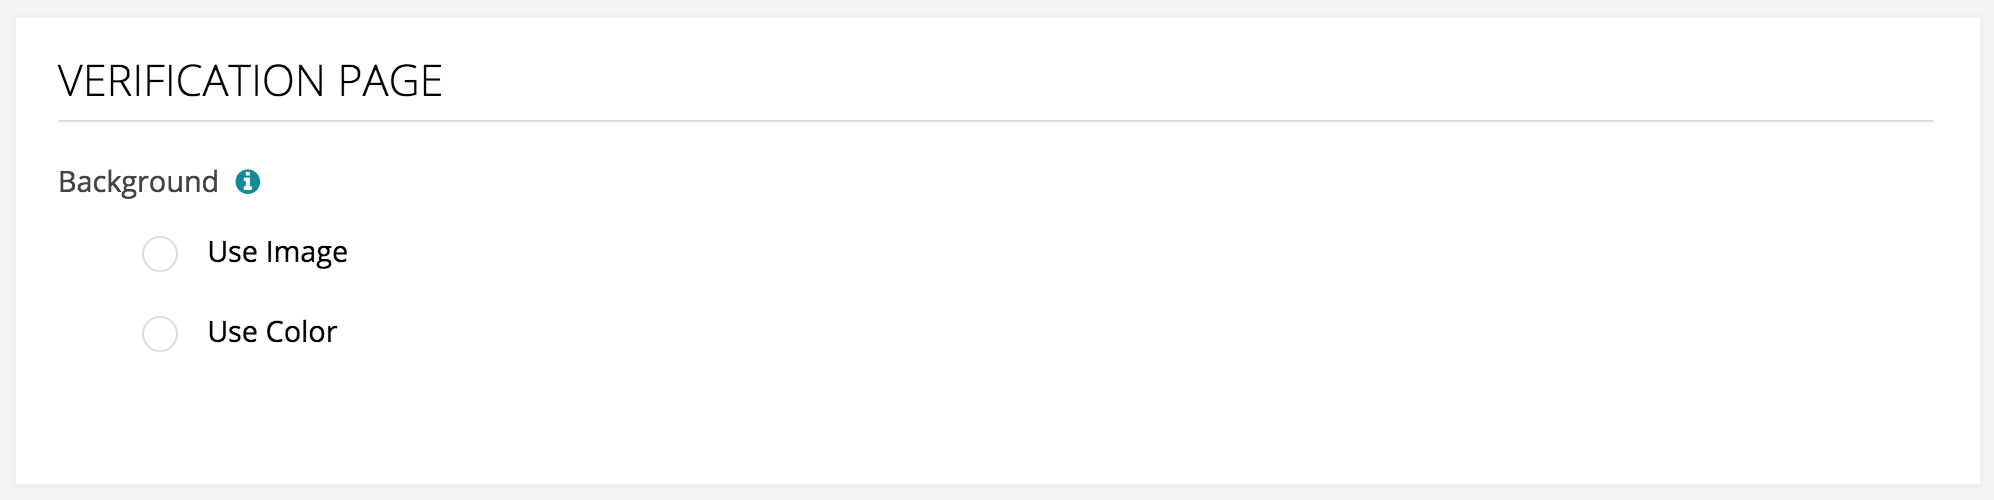
Verification Page
> Choose either a solid color or an image to appear as the background for your verification page.
Requests
MANAGING REQUESTS
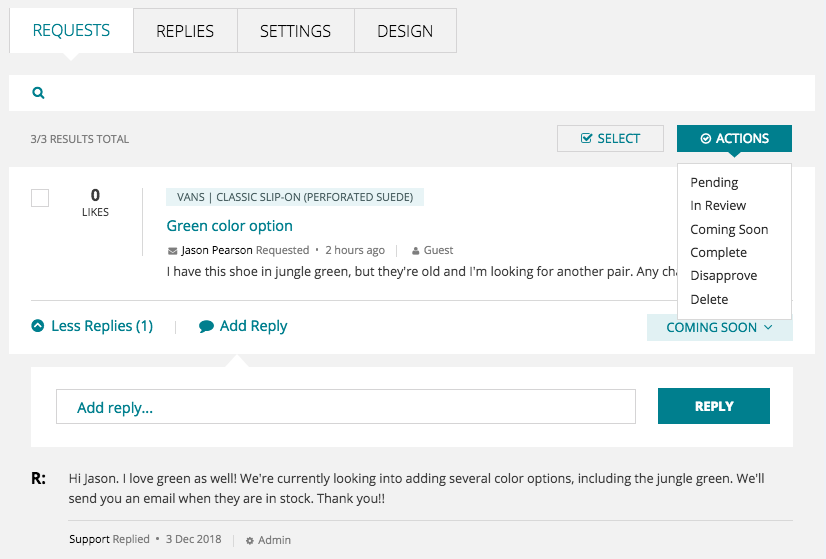
>Customer requests can be managed by selecting “Requests” from the app menu bar.
>From the “Requests” tab you can view, reply, and edit the status of a request.
> Actions - Admin users can mark a request as Pending, In-Review, Coming
Soon, Completed, deleted, or disapproved. Deleted requests will only be visible to
admin users.
> View User Contact Information - Select the  “mail envelope” icon to view
the name and email address of the customer making the request, as well as the time the request was made.
> Add Reply - Select “Add Reply” to add a reply to the customer request. Replies are visible to shoppers.
> More Replies / Less Replies - Select to view additional or fewer replies.
> Select the product name to be redirected to the corresponding product page on the website.
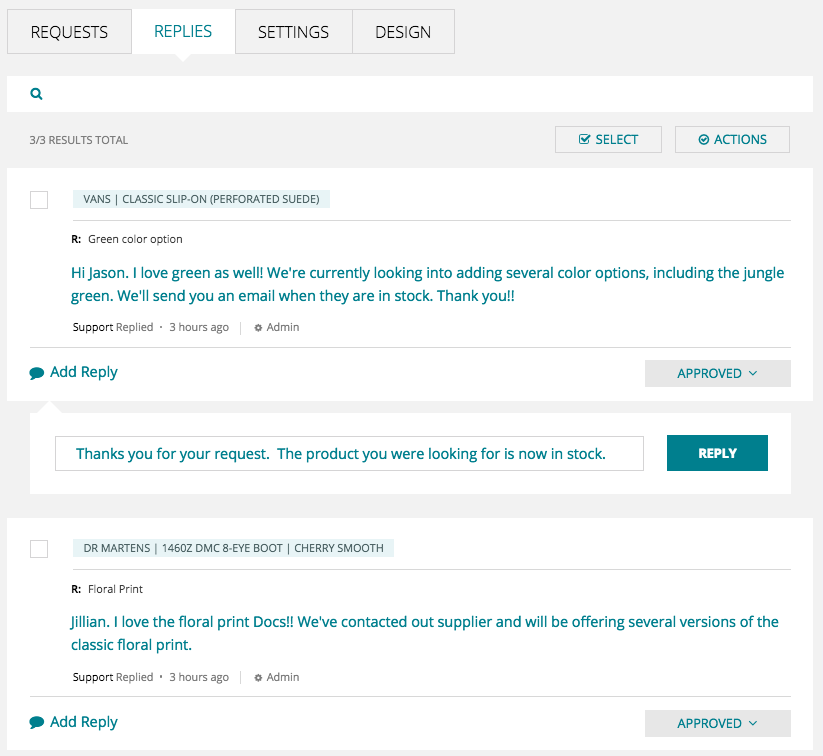
Replies
Managing Replies
> View Replies - Customer and admin replies can be managed by selecting “ Replies” from the app menu bar.
> Actions - Select “Actions” to mark a reply as Approved, Pending, Disapproved, or Deleted.
> Add Reply - Select “Add Reply” to respond to a customer comment or request.
> Select the product name to be redirected to the corresponding product page on the website.
Uninstallation
Uninstalling the App
> Select “Product / Feature Request” from your store’s Shopify admin panel.
> Select the  trash can icon and follow the pop-up window instructions.
> Select Uninstall to remove the app and its data from your store.
